Troubleshooting FAQ
The following sections provide answers to frequently asked questions about problems that you might encounter.
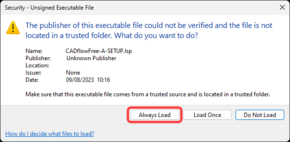
The CADflow Free ribbon doesn't load using the Setup tool - how can I load the menus?Option 11. Open Windows Explorer and navigate to the relevant folder:
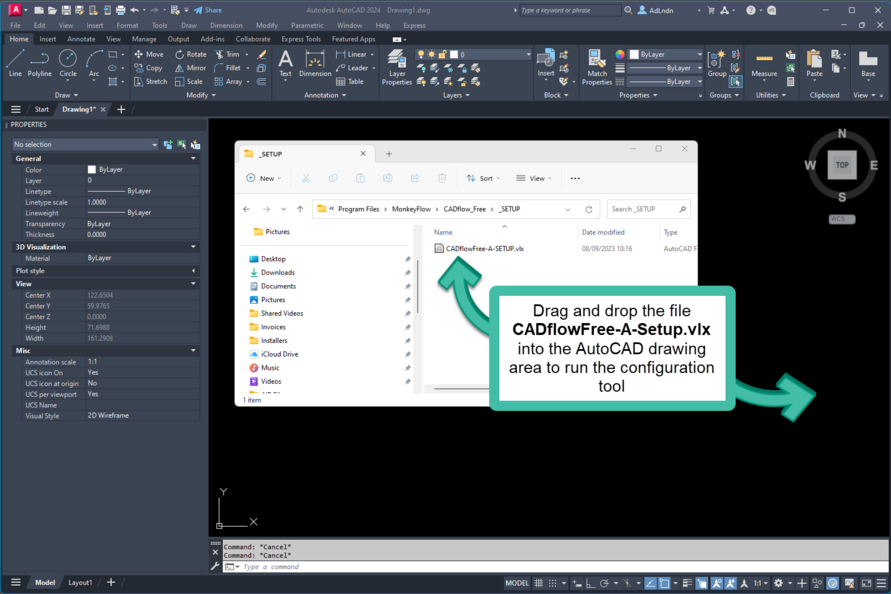 Click Always Load should a dialogue appear with the options below:
 If successful the following message is displayed on the command line.
 7. The configuration tool will do the following:
Note - if using BricsCAD, the installation folder is C:\Program Files\MonkeyFlow\CADflow_Free_BricsCAD
8. Copy / Paste the activation code from your Welcome email into the Enter License Key box and click OK.
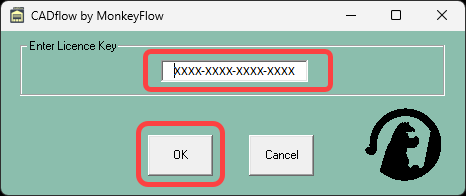 Should you wish to activate CADflow Free at a later date, simply select a tool on the ribbon to prompt the Activation dialogue.
9. Close and restart AutoCAD to save the settings.
Option 21. Open AutoCAD / BricsCAD.
2. Type in Options at the command line.
AutoCAD users only to proceed with step No.3 - skip to step No.9 if using BricsCAD3. From the Files tab click on the + symbol next to Support File Search Path (no.1 below), select Add (no.2) then Browse (no.3), and navigate to:
C:\Program Files\MonkeyFlow\CADflow_Free
Click Open to add the search path. Once added to the list select the path and use the Move Up button to move the path to the top of the list as shown at no.1 below.
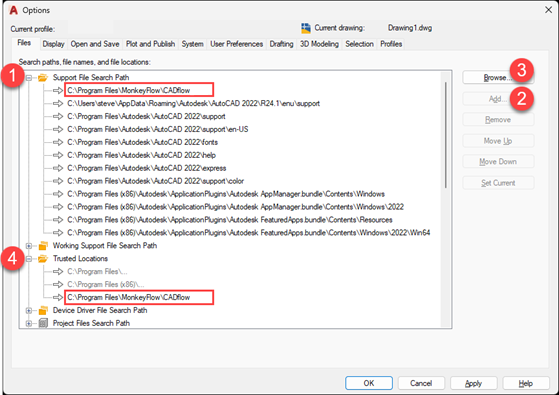 4. Next, from the Files tab click on the + symbol next to Trusted Paths (no.4), select Add (no.2) then Browse (no.3), and repeat adding the same path as image above.
5. Click OK to close the Options dialogue.
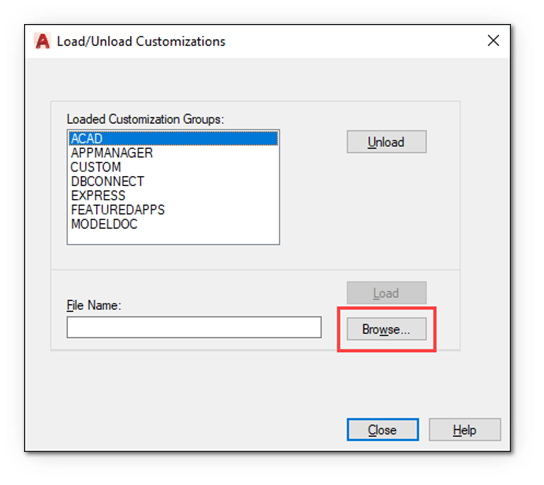
6. Type MENULOAD on the AutoCAD command line to open the Load / Unload Customization dialogue box.
Click Browse and navigate to:
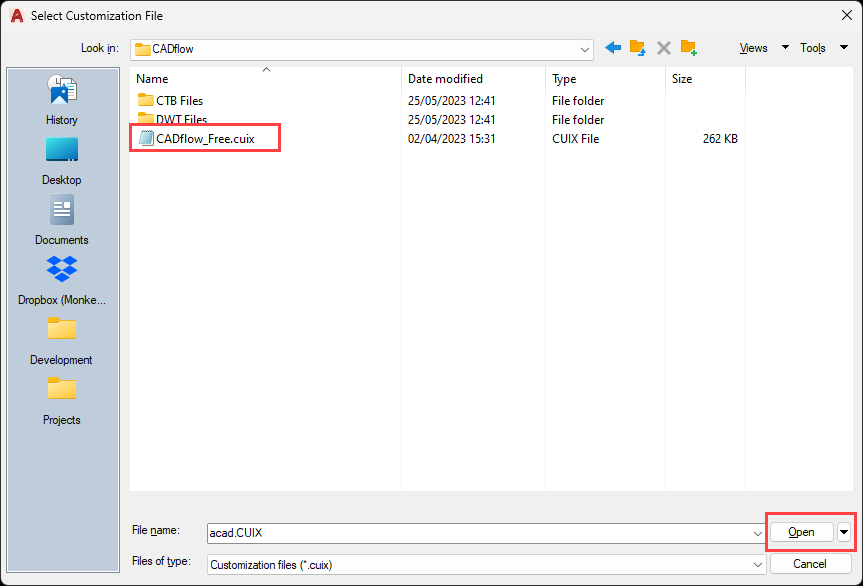
C:\Program Files\MonkeyFlow\CADflow\CADflow_Free.CUIX
7. Select CADflow_Free.CUIX and click Open as image below.
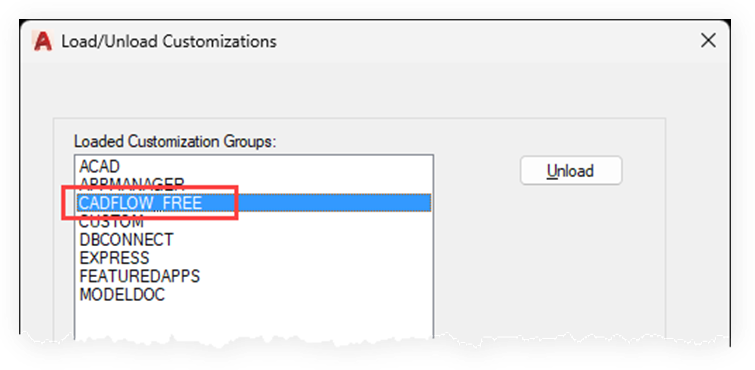
 8. Select Load to add the CADflow Free menu. Once CADflow Free is displayed in the Loaded Customizations Groups list, click Close to return to the AutoCAD screen.
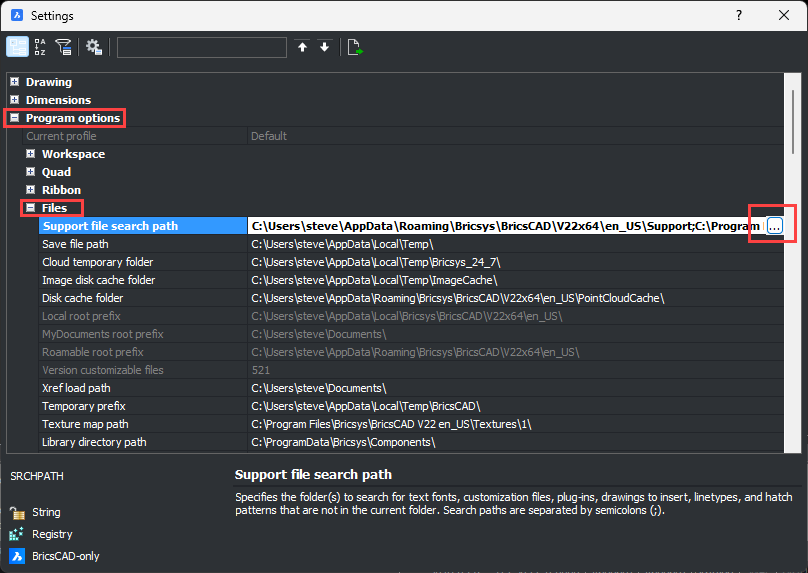
 BricsCAD users only to proceed with step No.9 - skip to step No.14 if using AutoCAD9. From the Settings dialogue open Program options> Files as shown and click the … button at the end of the Support File Search Path line to open the Path List dialogue.
 From the Path List dialogue, click the … button at the end of the bottom blank line as shown:
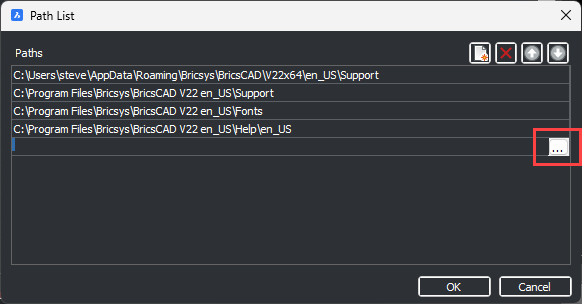 Then navigate to C:\Program Files\MonkeyFlow\CADflow_BricsCAD
Click Select Folder to add the search path. Once added to the list click on the path and use the Up arrow button to move the path to the top as the shown below.
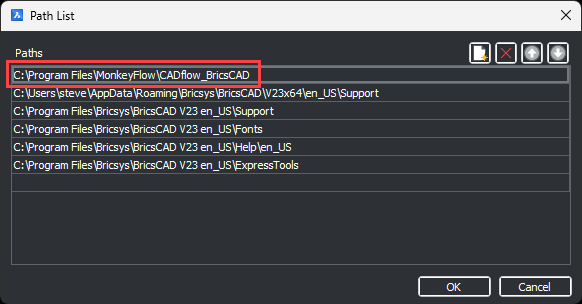 10. Click OK and close the Options dialogue.
11. Type MENULOAD on the BricsCAD command line to open the Customization Groups dialogue box.
12. Click … and navigate to C:\Program Files\MonkeyFlow\CADflow_BricsCAD
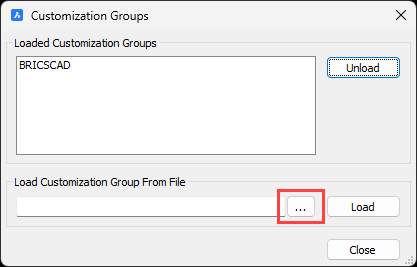 Select CADflow_Free.CUI and click Open as screenshot below to return to the Customization Groups dialogue.
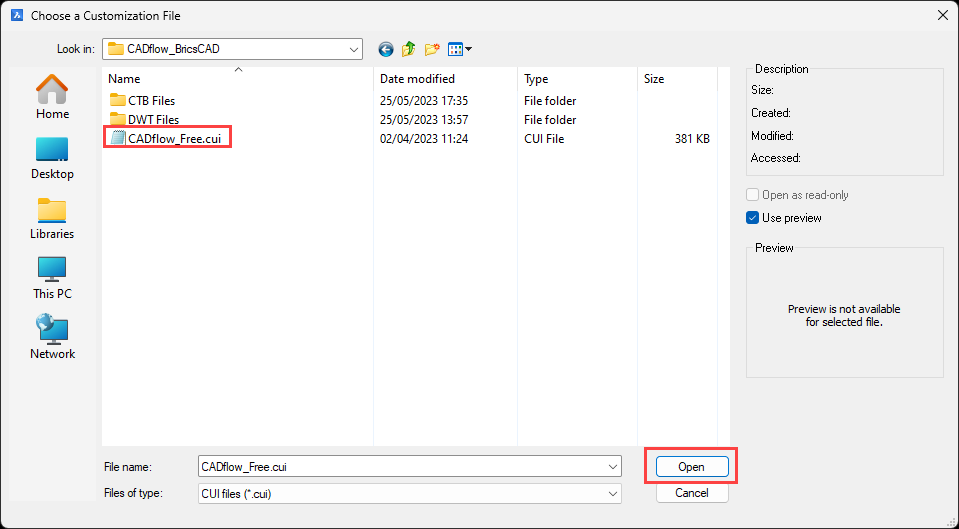 13. From the Customization Groups dialogue click Load then the Close button to return to the BricsCAD screen.
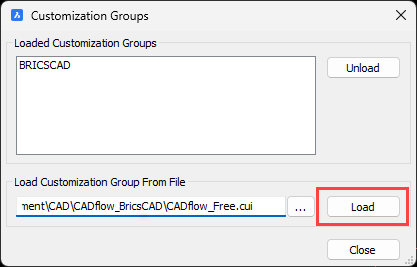 14. The CADflow Free ribbon tabs should now be displayed. Should you also require the CADflow Free pull-down menus to display type in MENUBAR on the AutoCAD command line and set it to 1.
15. To run CADflow Free click on any ribbon button to open the Activation dialogue. Copy / Paste the activation code from your Welcome email into the Enter License Key box and click OK.
 16. Close and restart AutoCAD to save the settings.
17. To complete the CADflow Free configuration the DWT (title sheets) also need to be set up to suit your company requirements.
Please refer to the pages Title Sheets (DWT) Files and Plot Style (CTB) Files.
|
If you have not found the answer to your question, please email us at: troop@monkeyflow.co.uk.
