

Running Sheet Issue
The SheetFlow dialogue contains three tabs, Naming, Selection and Export.
We recommend running through each tab in order prior to hitting the Export button.
Naming Tab
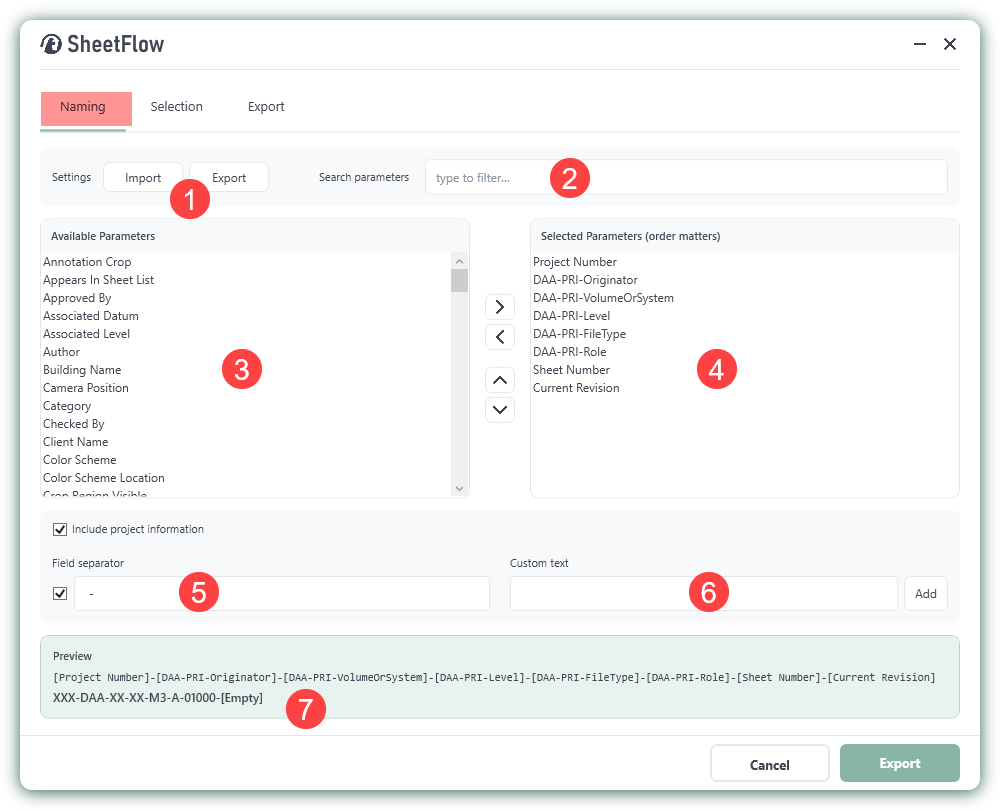
-
Import / Export - allows configuration settings to be saved out to an XML file then imported when required. We recommend keeping a specific file for each project you have and keeping in a central location where all users have access.
-
Search Parameters - search a parameter name to filter the Available Parameters list.
-
Available Parameters - displays list of available parameters, simply select and click the left / right arrows to add / remove from the Selected Parameters list.
-
Selected Parameters - contains list of parameters that make up the exported sheet file name. Use the Up / Down arrows to adjust the position of each parameter, check out the Preview box (7) for a preview of how the file name will look.
-
Field Separator - controls the character used a separator between each parameter.
-
Custom text - add additional custom text to the exported file name.
-
Preview - provides a live preview of the exported file name as listed in the Selected Parameters panel.
Selection Tab
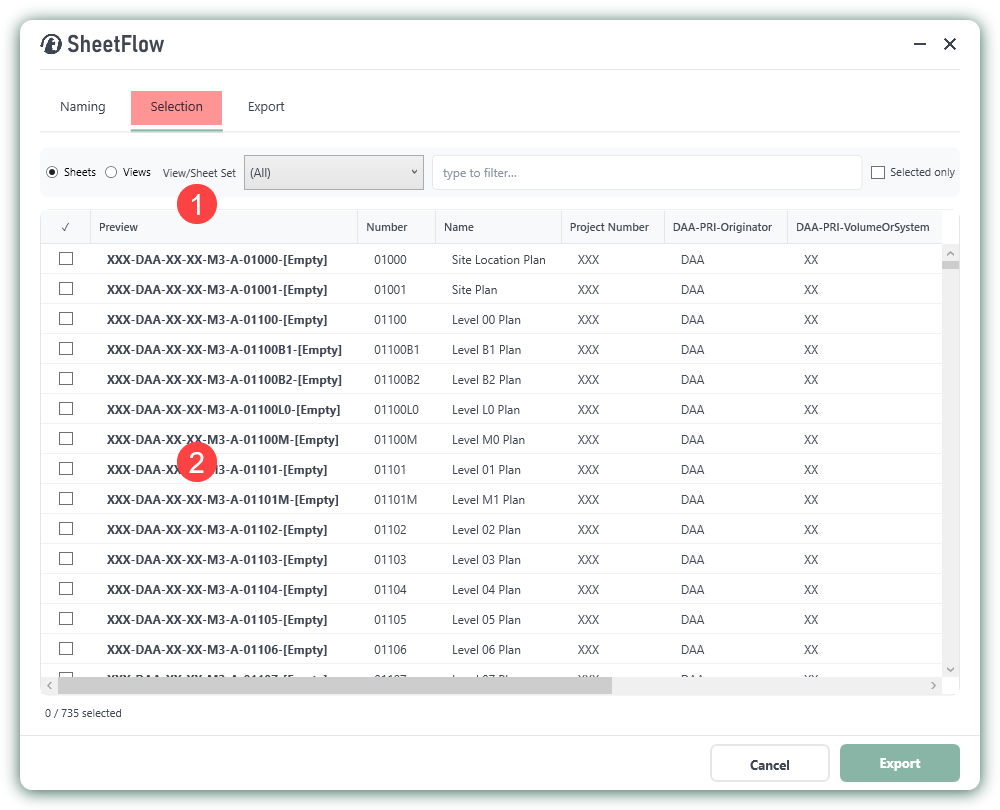
-
Sheets / Views / Sheet Set - allows the Preview list to display sheets, views or predefined Sheet Sets for easier selection, or alternatively use the text filter box.
-
Preview - displays the list of sheets, using the parameters assigned from the Naming tab.
Export Tab
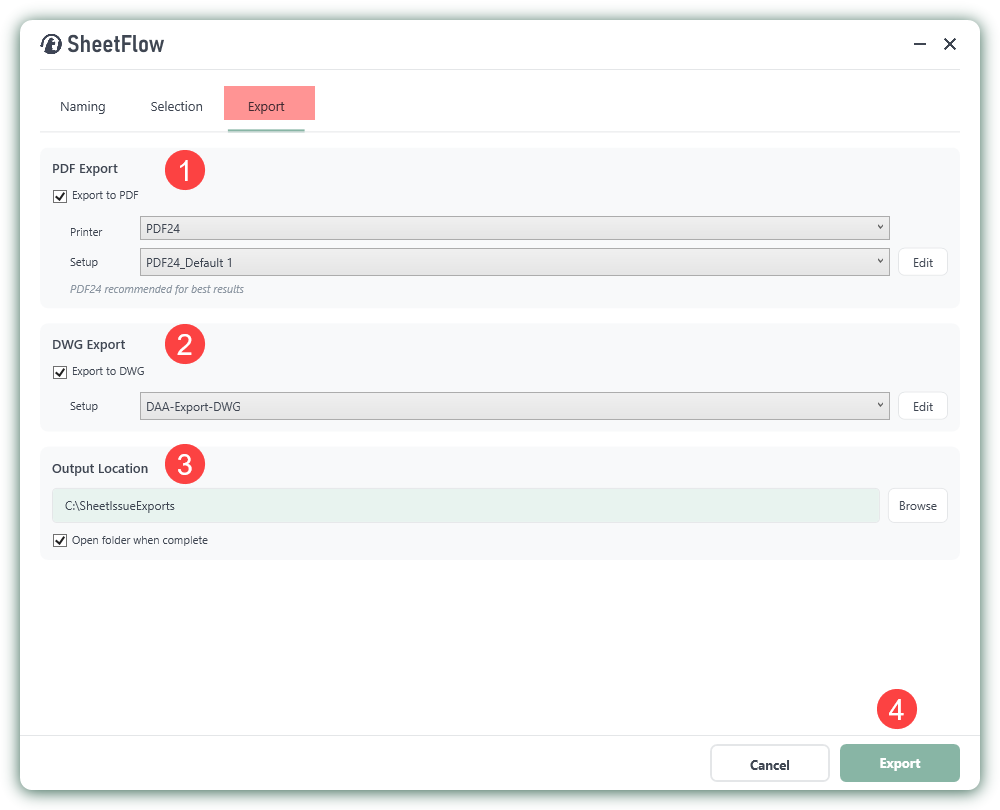
-
PDF Export - use the check box to turn on / off PDF file creation. Use the Printer and Setup pull down's to select the required PDF printer. We recommend using the PDF24 Creator driver which is a free tool and can be downloaded here PDF24 Creator - Download.
-
DWG Export - use the check box to turn on / off DWG file creation. Use the Setup pull down to select the DWG Export style to use.
-
Output Location - set the folder to where the created data is to be exported. Place a check in the Open folder when complete box to open the output folder location.
-
Export - once all the steps have been followed, click the Export button to run the tool.